
3월 셋째 주 이번 주 레시피
화전 레시피

모두들 봄 방학은 잘 지내셨나요? 봄 방학이 끝날 때 즈음, 어느덧 콜럼버스에도 봄이 찾아오고 있는데요, 지난 주 부터는 날씨가 따뜻해져, 섭씨 온도가 영상으로 올라오기 시작하더니 다음 주 부터는 본격적인 봄 날씨가 시작 될 것 같습니다. 학교 공부도 물론 중요하지만, 날씨가 풀리면 주말에 친구들과 함께 소풍을 나가보는 것은 어떨까요? 봄 소풍을 나가면 흔히 볼 수 있는 것이 바로 꽃이죠? 꽃과 함께라면 예쁜 사진을 찍을 수 도 있겠지만, 꽃을 활용하여 음식도 만들 수 있다는 사실 알고 계셨나요?̊̈ 꽃을 활용한 대표적인 음식이 바로 화전인데요, 화전은 오래전부터 봄기운이 왕성한 3월 나들이 음식으로 즐겨먹었던 우리나라 전통음식입니다. 예쁜 꽃이 피어나길 기다리며 봄을 맞이하는 요리, 눈과 입으로 즐기는 음식, 화전 레시피를 소개합니다.
재료 : 찹쌀가루 100g, 끓는 물 한 컵 반, 소금 약간, 식용 꽃, 식용유, 시럽 ( 설탕 5큰술, 물 5큰술)
- 반죽 만들기
- 찹쌀가루에 소금을 섞고, 끓는 물을 부역자며 말랑말랑하게 반죽한 다음, 반죽을 비닐 봉지에 넣어 30분 정도 기다립니다.
- 재료 손질하기
- 식용 꽃을 흐르는 물에 씻어 물기를 제거합니다.
- 반죽 빚기
- 반죽을 비닐 봉지에서 꺼내 지름 3cm 정도 크기로 동글 납작하게 빚습니다.
- 화전 지지기
- 달군 팬에 식용유를 두르고 빚은 반죽을 약한 불로 굽다가 뒤집어 위에 식용 꽃을 얹고 손으로 살짝 눌러 붙여 완성합니다.
- 시럽 만들기
- 설탕과 물을 넣고 젓지 않고 중불에서 서서히 끓여 양이 반 정도 될 때까지 조려 시럽을 만듭니다. 굳지 않게 잘 저어줍니다. 시럽은 꿀과 물을 섞은 꿀물로 대체 할 수 있습니다.
- 화전 완성하기
- 그릇에 설탕 시럽을 뿌리고 화전을 담은 후 시럽을 그 위에 끼얹습니다.
- 차와 함께 맛있게 먹는다!
Hwajeon (flower rice cake) recipe
Hwajeon is a light, fluffy rice cake that makes a great dessert or snack. With a flower on the top, it’s almost too beautiful to eat! In Korea, hwajeon is often made with edible azalea flowers which bloom wild in the mountains in springtime. People used to go out for a picnic in the early spring, bringing a heavy pan and some ingredients. They would pick the azaleas or any other edible flowers they could find, and then make and pan-fry rice cakes right there in the mountains!
It is hard to imagine how much fun that must have been, and what a great mood everyone must have been in, eating these rice cakes in the mountains, in the fresh springtime breeze after a long winter. However, you don’t have to go the mountains to enjoy the rice cake. You can make it at home, and go out for a picnic with your hwajeon. No matter where you are, making this flower rice cakes would put anyone in a good mood, because it’s not only fun, but also, it’s just so beautiful. Enjoy the recipe!
Ingredients : glutinous rice flour 100g, hot boiling water a cup and a half, salts, edible flowers, olive oil, syrup ( 5 tablespoons of sugar, 5 tablespoons of water)
- Make rice cake
- Combine sweet rice flour and salt in a bowl. Add ¼ cup hot water and mix well with a wooden spoon until the dough has cooled enough that you can knead it by hand. Knead the dough until it’s smooth, then keep them covered with a piece of plastic wrap so they don’t dry out.
- Trimming edible flowers
- Wash the edible flowers, and make sure it’s clean.
- Kneading
- Divide the dough into 5 equal sized pieces, and roll each piece into a ball. Press each rice cake ball into a disc about 3cm in diameter.
- Pan frying
- Heat up a non-stick pan over medium high heat. Add 2 teaspoons olive oil, swirling the pan to coat the surface. Once it’s heated up, turn the heat down very low. Put the rice cakes on the pan and cook them for a few minutes. When the bottoms are slightly crispy turn them over and flatten them out with a spatula. Cook a few more minutes. Place edible flowers on the top of each rice cake, then flip them over and press them down for 1 or 2 seconds.
- Make syrup
- Put sugar and water in a small sauce pot. Cook over very low heat and simmer for 5 minutes. Don’t stir it with a spoon, just make sure it gets well combined in the pot by swirling the pot every now and then.
- Serve
- Drizzle the syrup on top of the rice cakes. Serve with tea as a dessert of snack.
- Enjoy your Hwajeon!
무생채 레시피

맛있게 드세요~ 보쌈에도 맛있고 비빔밥에도 넣어 먹으면 맛있는 무생채 다들 먹어보세요!!
재료 : 무 한개 ( 채 썰었을 때 약 6줌), 대파 1개, 고춧가루 4스푼, 설탕 2스푼, 꽃소금 2스푼, 피쉬 소스 2스푼, 통깨 2스푼, 다진 마늘 2스푼, 생강가루 약간, 참기름 1스푼
- 무는 세척 후 껍질을 필러로 제거하고 채 썰어줍니다. *채칼을 사용하면 편합니다.
- 대파는 얇게 어슷썰기로 썰어 준비합니다.
- 무채에 고춧가루 4스푼과 썰어둔 쪽파를 넣어 골고루 섞어줍니다.
- 설탕 2스푼, 다진마늘 2스푼, 소금 2스푼, 생강가루 약간, 피쉬 소스 2스푼, 통깨 2스푼, 참기름 1스푼을 넣어 골고루 버무려 주며 섞어줍니다.
- 맛있게 먹는다!
Daikon Radish Salad (Museangchae 무생채) Recipe
Today, we are going to share an easy Korean side dish recipe – daikon radish salad. It is a salad like dish that is made with julienned radish. It is made spicy with gochugaru which is a red chili pepper flakes, and other seasonings such as garlic, and fish sauce. You might have had it at some Korean restaurants, because it goes well with almost every korean dish. This crunchy, sweet, and sour dish is simply refreshing! It also takes less than 10 minutes, so you definately need to try it! The recipe will be posted on the KBS website, so you should go check it out!
Ingredients : a peeled white radish, finely chopped green onion, 4 tbsp of Korean chili flakes (gochugaru), 2 tbsp of sugar, 2 tbsp of fine sea salt, 2 tbsp of fish sauce, 2 tbsp of minced garlic, sesame oil
- Julienne the radish with your knife of using a mandolin slicer. Ideal size would be 6cm to 7cm long match stick style.
- Put the radish into a mixing bowl then add the sauce.
- Mix them well with your hands.
- Garnish with the green onion.
- Transfer the seasoned radish into a glass container and rest it for 30 mins in the fridge then serve.
- Enjoy your meal!
2월 마지막 주 레시피

불고기 김치 타코
재료 : 소고기 다짐육 150g ,작은 또띠아 4장, 적양파 1/4개, 고수, 통깨, 설탕, 간장, 참기름, 다진 마늘, 김치, 버터, 마요네즈, 스리라차 소스, 라임즙
- 적양파는 다지고 마요네즈, 스리라차 소스, 라임즙은 섞어 스리라차 마요 소스를 만듭니다
- 작은 볼에 양념 재료를 미리 섞어둔 뒤 소고기에 넣고 버무려 잠시 재웁니다.
- 김치는 먹기 좋은 크기로 썰어 버터를 녹인 팬에 설탕을 소량 넣고 볶습니다.
- 달군 팬에 기름을 살짝 두르고 재워둔 소고기를 넣어 주걱으로 으깨어가며 볶습니다.
- 마른 팬에 또띠아를 앞 뒤로 살짝 데워 말랑하게 만듭니다.
- 데워둔 또띠아 위에 소고기, 적양파, 김치를 올리고 스리라차소스, 통깨를 뿌립니다.
※ 취향에 따라 고수를 다진 뒤 뿌립니다.
- 맛있게 먹는다!
Bulgogi kimchi taco
Ingredients: 150g of beef, 4 small tortillas, 1/4 of red onions, cilantro, sesame seeds, sugar, soy sauce, sesame oil, minced garlic, kimchi, butter, mayonnaise, Sriracha sauce, lime juice
- Place steak in the freezer fothe r about 15 minutes, which will firm it up a bit, allowing you to cut thin slices. Trim excess fat from steak and very thinly slice.
2. Using the finest side of a grater, grate the pear and onion. - Combine with garlic, ginger, soy sauce, brown sugar, mirin, and sesame oil (optional) in a medium mixing bowl.
- Add thinly sliced steak, cover with plastic wrap and place in refrigerator, allowing to marinate for at least 2 hours, and up to 24 hours.
5. Remove steak from refrigerator approximately 20-30 minutes before ready to cook. Remove steak from marinade and combine with scallions in a bowl. - Heat canola oil in large skillet or grill pan over high heat. Add steak and scallions to pan in a single layer and cook, stirring, until cooked through, about 2-3 minutes.
7. Mix all ingredients together until well combined. - Place bulgogi in tortilla and top with chopped kimchi, sliced avocado, green onions and aioli.
9. Enjoy your meal!
2월 셋째 주 이번 주 레시피
초간단 닭 죽 만들기

미국 마트에서 쉽게 구할 수 있는 닭 육수 ( chicken broth)! 요리를 자주 하시는 분이라면 한 번쯤은 사용해보셨을텐데요, 이 닭 육수를 사용한다면 음식 맛의 풍미를 더욱 깊고 알차게 되기 때문에 여러 음식에 자주 사용되곤 합니다. 닭 육수가 맛을 내는데 한 몫을 하니 요리를 잘 못하거나 바쁜 학생 분들한테는 정말 유용한 재료이겠죠? 그래서 오늘은 닭 육수를 활용한 초간단 닭 죽 레시피를 들고 왔습니다. 몸이 안좋거나 아파서 입맛이 없을 때 정말 죽만한 것이 없죠? 또한, 집에 남은 치킨과 밥이 있다면 금방 쉽게 만들 수 있는 게 이 닭 죽이니 남은 음식을 신선하게 먹고 싶다면 추천하는 레시피 입니다. 기숙사 생활을 하거나 타지에서 유학 생활 하다보면 꼭 아플 때가 있는데요, 아플 때 이 닭 죽 레시피를 활용해 만들어 먹으면 더욱 더 빨리 나을 수 있지 않을까요? 레시피는 KBS 웹사이트에 올라갈 예정이니 꼭 참고하여 주시길 바랍니다.
재료 : 야채 (당근,호박, 양파), 닭가슴살, 치킨 육수, 소금, 후추
- 당근, 호박, 양파등 야채를 적당 크기로 썰어줍니다.
- 닭가슴살은 익혀서 먹기좋게 잘 찢어줍니다.
- 큰 냄비에 올리브유를 둘러 중불에 달궈준 후, 썰은 야채들을 넣어줍니다.
- 야채들의 색이 연해질 때까지 (대략 6분) 잘 저어주며 익혀줍니다.
- 치킨 육수와 물을 넣고, 잘 섞어준 후, 쌀과 닭가슴살을 넣어줍니다. 간은 소금과 후추로 맞춰줍니다.
- 밥이 부드러워질 때까지(대략 25분-30분) 중불에서 익혀줍니다.
- 맛있게 먹는다!
Chicken broth is very versatile, and it is easy to cook, so if you have one, it will be one of the most useful ingredients as a busy college student. Therefore, we brought an Easy Chicken and Rice Soup using a chicken broth. This Easy Chicken and Rice Soup is a soup you make when you are sick or when someone else is sick and in need of a warm bowl of comfort. Also, when you are feeling lazy, but want a healthy, homemade meal, try this soup. To keep it easy, we used the chicken breast as well, but you can use rotisserie chicken from the store or leftover chicken. If you have leftover turkey from the holidays or a big family meal, you can use turkey instead. It works just as well. You can use wild rice or brown rice, it will just take a little longer to cook. This soup also freezes well, another reason to love it!
Easy Chicken and Rice Soup, it doesn’t get any easier! Warm up with a bowl today! The recipe will be posted on the KBS website, so please go check it out!!
Have you heard about broth? You probably have some experience either cooking with broth or consuming it. There are many different kinds of broth out there, as it is commonly used to produce more intense flavors with thicker textures. Chicken broth, one of the most popular borths, is very versatile, and it can easily be bought at a grocery store. Guess what – we have an easy to make chicken rice soup that is made with chicken broth! You might had this soup when you weren’t feeling great as it makes you feel better. It is actually really easy to make! You can make it with rice, any form of chicken meat – even leftover chicken! We recommend you to try out this recipe if you ever get sick. The recipe will be posted on the KBS website. You should check it out!
- Chop all vegetables you have
- Place a large pot over medium heat and add the olive oil. Then add the vegetables.
- Let it cook for 6 minutes, stirring the entire time. Continue until the vegetables are softened but not browned.
- Pour in both the chicken broth and water then bring the soup to a boil.
- Add in the rice and chicken; season with salt and pepper.
- Cook on medium-low until the rice is tender, about 25~30 minutes. Serve warm.
- Enjoy the food!
2월 둘째 주 이번 주 레시피
소고기 미역국

한국인들이 가장 좋아하는 해산물이 무엇인지 혹시 아시나요? 꽃게? 새우? 전복? 한 설문조사에 따르면 우리나라 사람들이 가장 좋아하는 해산물은 바로 미역이라고 합니다. 그럴만도 한게, 누군가의 생일 때 “ 오늘 미역국 먹었어?”라는 말로 축하의 의미가 담긴 안부 인사를 전하기도 하고, 출산 후 산모의 건강을 위해 반드시 먹어야 하는 건강식중 하나가 바로 미역국이기 때문입니다. 풍부한 식이섬유 덕에 건강에도 좋고, 깊은 국물 덕에 맛까지 챙길 수 있는 미역국을 미국에서도 챙겨먹으면 좋지 않을까요? 그래서 오늘 준비한 레시피는 소고기 미역국입니다. 미역국은 요리 초보자들도 쉽게 만들 수 있는 요리 중 하나이기 때문에, 재료만 있다면 충분히 흔히 말하는 “어머니의 맛”을 낼 수 있을 것입니다! 혹시 주변에 생일을 맞는 친구가 있다면, 이 레시피를 보고 미역국을 만들어 준다면, 정말 특별하고 잊지 못할 선물이 될 수 있지 않을까요? 레시피는 KBS 웹사이트에 올라와 있으니 꼭 확인 부탁드립니다! 또한 KBS 멤버중 미모 담당을 맡고있는 정조현양의 생일이 바로 이번주 토요일 2월 16일인데요, 이 레시피를 참조하여 정조현양의 미역국을 끓여 생일을 축하해주시길 바랍니다^^
재료 : 건미역, 소고기, 국간장, 참기름, 소금, 다진 마늘
- 미역 네 줌을 물에 10분 정도 불려줍니다.
- 국거리용 소고기의 핏물을 제거합니다.
- 소고기의 핏물을 제거했으면 냄비에 참기름 1큰 술과 다진 마늘 반 큰술, 핏물을 제거한 소고기를 넣고 함께 볶아줍니다.
- 볶은 소고기에 불린 미역을 넣고 볶아줍니다.
- 물기가 없어질 때쯤 물 한 컵을 넣고 다시 볶아줍니다.
- 볶다가 물기가 줄면 다시 물 10컵을 넣고 센 불에서 20분 정도 끓여줍니다.
- 미역국을 20분 정도 끓이면 먹음직스러운 뽀얀 국물이 나올 것입니다. 이때, 국간장 1큰 술, 소금 반 큰술, 다진 마늘 1큰 술을 넣고 10분간 더 끓여주면 더욱더 깊은 맛이 우러나옵니다.
- 맛있게 먹는다!
Seaweed soup (miyeok guk), known as a birthday soup, is a soup predominantly made with brown seaweed since Koreans eat this soup on their birthday. Do you know why people enjoy this special soup on their birthday? Seaweed soup is often served for a woman who just delivered a baby because it contains a lot of nutritions to help the recovery and produce breast milk. That is one of the reasons why people enjoy a seaweed soup on their birthday. Seaweed soup is one of the easiest food to make, so even though you are a beginner, I’m sure you can make a delicious seaweed soup too! The recipe is on the KBS website, so go and check the recipe!
Ingredients : Dried Brown Seaweed, Beef Top Sirloin, Sesame Oil, Soy Sauce for Soup, Salt, Minced Garlic
- Soak seaweed in water for 10 minutes.
- Heat a saucepan over medium heat and add beef, sesame oil, ½ tablespoon soy sauce, and a little bit of salt.
- Add seaweed into the saucepan and stir.
- Pour in 2 cups of water, and bring it to a boil.
- Add garlic, soy sauce, salt, and 8 cups of water, and stir
- Cook it for 20 mins.
- Enjoy your meal!
2월 첫째 주 이번 주 레시피
어묵 잡채

재료 : 당면 한 줌, 간장 8큰술 ( 당면 삶을 때 3큰술, 잡채 볶을 때 5큰술 ), 설탕 3큰술,양파, 당근, 시금치, 대파, 어묵, 맛살, 참기름, 깨
- 잡채에 들어갈 재료들을 (양파, 당근, 시금치, 대파, 어묵, 맛살) 손질해줍니다. 그리고 시금치는 바로 사용해줄 거라 따로 데칠 필요 없이 깨끗이 씻어만 줍니다.
- 당면 한 줌을 끓는 물에 넣어 6~8분 정도 삶아줍니다. 그리고 당면을 삶아줄 때 간장 3큰술도 넣어줍니다.
- 삶은 면은 찬물에 2~3회 정도 헹구고 물기를 빼줍니다.
- 달군 팬에 [ 양파 – 당근 – 어묵 – 맛살 ] 순으로 넣어가며 볶아줍니다.
- 볶아진 야채에 간장 1큰술을 넣어준 뒤 대파와 시금치를 넣고
- 볶아줍니다.
- 삶은 면과 간장 4큰술, 설탕 3큰술을 넣고 달달 볶아준 뒤 참기름과 깨로 마무리해줍니다.
- 맛있게 먹는다!
Japchae with fishcake
Ingredients: 6 ounces Korean potato starch noodles (dangmyeon, 당면)
1 small carrot, 1 small sweet onion, 2 scallions, fishcake, 6 ounces fresh spinach, vegetable oil for stir frying, salt and pepper ,
Sauce : 3 tablespoons soy sauce, 2 1/2 tablespoons sugar, 2 tablespoons sesame oil, 2 teaspoons roasted sesame seeds
- Cut the carrot into match sticks. Thinly slice the onion. Cut the scallions and spinach into similar lengths. Cut the ricecake into thin 2-inch long strips. You don’t have to blanch the spinach.
- Combine all sauce ingredients in a small bowl and mix well until the sugar is dissolved.
- Bring a pot of water to a boil, and cook the noodles for 6 – 7 minutes. Rinse in cold water and drain. Cut the noodles with kitchen shears or a knife into 6 -7 inch lengths. Mix in 2 tablespoons of the prepared sauce in a large bowl.
- In a large non-stick skillet, stir fry the noodles over medium heat, stirring frequently, until translucent and a bit sticky (about 4 minutes). Transfer back to the bowl.
- Add 1/2 tablespoon of oil to the pan, and stir fry the onion until translucent over medium high heat, lightly sprinkling with salt and pepper. When the onion is almost done, stir-in the scallion and cook briefly. Transfer to the bowl with the noodles. Stir fry the carrot for 1 to 2 minutes until softened. (Do not overcook. The vegetables should be crisp.) Transfer to the bowl.
- Stir fry the fish cake together for 2 – 3 minutes. Transfer to the bowl.
- Add the spinach and the remaining sauce to the bowl with all other prepared ingredients.
- Toss well by hand. Adjust the seasoning to taste by adding a little more (start with 1/2 teaspoon) soy sauce and/or sugar as necessary.
- Enjoy your meal!
2019년 넷째 주 오늘의 레시피
참치 캔 라자냐

새 학기가 시작이 된지 3주가 조금 넘었는데요, 새 학기가 시작되며 새로운 수업도 듣고 새로운 동아리도 가입하며 새로운 친구들을 사귀지는 않았나요? 저희 KBS도 이번 봄 학기를 맞이하여 새로운 멤버들을 채용하고 지난 주 친목 도모를 위한 간단한 모임도 가졌습니다. 친목 도모를 하며 간단한 술 자리를 갖는 것도 친해지는 데 나쁘지 않는 방법인데요, 그래서 이번 주 레시피는 간단한 재료로 쉽게 만들 수 있는 술 안주, 참치 캔 라자냐를 준비하였습니다. 본래 라자냐는 오븐을 이용해야 하기 때문에, 자칫 어려울 수 있는 요리인데요, 오늘 준비한 레시피는 전자레인지를 사용하고, 또한 참치 캔을 이용하기 때문에 재료도 쉽게 구할 수 있을 뿐만 아니라, 시간 단축까지 할 수 있습니다. 꼭 술 안주가 아니더라도 정말 맛있는 참치 캔 라자냐, 간단하니 모두들 꼭 만들어 보았으면 하고, 또한 새로운 친구들과 같이 만들며 우정도 쌓아보았으면 합니다. 레시피는 KBS 웹사이트에 올라 갈 예정이니 꼭 확인해보시길 바랍니다.
재료 : 라자냐 6장, 양파 1/2개, 참치 1캔, 토마토 소스 4큰술, 모짜렐라 치즈 2컵, 소금 약간, 후추 약간, 올리브유 약간, 파슬리 가루
- 라자냐 면을 삶은 후 올리브유를 면에 골고루 발라줍니다.
- 후라이팬에 올리브유를 약간 두른 후, 다진 양파를 볶다가 참치와 토마토 소스를 넣고 끓인 후, 소금과 후추로 간을 해줍니다.
- 접시에 라자냐 -> 참치토마토소스 -> 라자냐 -> 모짜렐라치즈 순으로 담은 후 전자레인지에 치즈가 완전히 녹을 때까지 돌려줍니다.
- 완성된 라자냐에 파슬리 가루를 뿌려 완성합니다.
- 맛있게 먹는다!
Lasagna with canned tuna
It has been about three weeks after OSU students started a new spring semester, and making friends in college can sometimes feel overwhleming when you are enrolled in a new semester of classes and don’t know any of your classmates. There are various ways to make friends in college, but probably having a dinner together can be one of the best ways to get close. Our KBS members had a small gathering for greeting new members last week as well. Like us, why don’t you throw a small home party with your new friends from your either new classes or clubs? Lasagna is by far one of the easiest dinner party meals, but full of taste, so if you share your homemade lasagna with your new friends, you will easily get a lifelong friends! Even this lasagna with canned tuna is much easier than any other lasagna recipes, so I hope you guys actually try and share your food! The recipe will be posted on the KBS website, so please go and check!
Ingredients: 6 lasagna noodles, onion ½, 1 can of tuna, 4 tablespoons of marinara sauce, 2 cups of grated mozzarella, salts and pepper, olive oil, parsley flakes
- Cook the lasagna noodle, and apply the olive oil evenly
- Put a little bit of olive oil in large saucepan, and cook tuna, chopped onion, and marinara sauce until the tuna is brown. Drain off all the fat.
- In a glass pan, layer noodles, sauce, and the mozzarella cheese; repeat that 3 times.
- Set microwave on high and cook until the cheese is completely melted.
- Sprinkle with parsley on the top layer of lasagna.
- Enjoy your meal!
이번 주의 레시피
2019년 1월 셋째 주
오렌지청 만들기
학기가 시작이 되고 며칠이 지나지 않아 본격적인 한파가 시작되었습니다. 차를 소지하신 학생 분들을 비롯하여, 기숙사에 사시거나 학교 근처에 사시는 모든 분들, 길을 다닐 때 조심하시길 바라고, 또한 추운 날씨에 감기 걸리지 않게 옷도 따뜻하게 챙겨 입으시길 바랍니다. 이렇게 추운 날씨에는 따뜻한 차를 마시며 몸을 풀어 주는 것도 감기를 예방할 수 있는 대책 중 하나 인데요, 그래서 이번 주는 특별히 오렌지 청 레시피를 들고 왔습니다. 오렌지 청은 미국에서 쉽게 구할 수 없는 유자를 대신 해 만든 과일 청인데요, 따뜻한 물에 오렌지 청을 풀어 마시면, 몸을 따뜻하게 해 줄 뿐만 아니라, 오렌지의 풍부한 비타민 C가 감기 예방에 탁월한 효과를 줄 수 있으니 이 추운 겨울에 알맞는 레시피가 아닐까 싶습니다. 만드는데 시간도 오래 소요되지 않으니, 바쁘시더라도 잠깐 시간을 내어 만들어 친구들에게 선물을 하면 이 추운 겨울을 따뜻한 마음으로 녹일 수 있지 않을까요?
Korean Yuja Cha (Yuza tea) is a traditional Korean tea made with citrus and honey, and it is enjoyed by Koreans or others seek a healthier lifestyle. It’s quite popular in the winter seasons, which makes sense because the vitamin C it contains may help to fight colds and flu, which are common in winter. It is easier to buy oranges in America, so I brought an Orange chung recipe instead of Yuju chung recipe! The recipe will be posted on the KBS website, so please go and check this recipe!

재료: 깨끗이 씻은 오렌지 5개, ¼ 컵 물, 3/4컵 꿀
- 베이킹 소다를 물에 풀어 오렌지를 깨끗하게 씻어줍니다.
- 오렌지 윗 부분과 아랫 부분을 넉넉하게 자른 후, 식감을 위해 껍질과 함께 오렌지를 손톱 크기 정도로 잘라줍니다.
- 오렌지와 설탕의 비율이 1:1이 되도록 설탕을 부어준 후에 설탕이 녹을 때 까지 랩을 씌운 후 30분 정도 기다립니다.
- 오렌지청을 소독 처리를 한 유리병에 담은 후 빈 자리는 다시 설탕으로 채워줍니다.
- 오렌지청을 담은 병의 뚜껑을 닫고 실온에서 하루 정도 보관 후에 다시 냉장보관합니다.
- 오렌지청을 드실 때에는 1스푼 정도를 덜어 따뜻한 물에 녹여 맛있게 드시면 됩니다!
Ingredients: 5 scrubbed and clean oranges, 1/4 cup water, 3/4 cup honey
- Slice the orange thinly and quarter them. Leave the peel intact but remove the seeds.
- Dissolve the honey in hot water, making a thick syrup.
- Add the orange slices to the mixture, mixing to combine into orange chung (orange marmalade).
- Keep the orange chung in a closed container at room temperature for one day and then store it in the refrigerator.
- To make tea, dissolve one spoonful of orange chung into one cup of water.
- Enjoy your tea!
이번 주의 레시피
2019년 1월 둘째 주
2019년 기해년 새해를 맞은 지도 어느덧 일주일이 넘었는데요, 저번 학기 시험과 과제로 인해 지쳤던 몸과 마음을 달래주었던 3주간의 짧았던 방학도 금새 끝이 나고 새로운 봄 학기가 시작이 되었습니다. 2019년을 맞아, 또 개강을 새로이 맞아 모두들 신년 계획을 짜진 않았나요? 일주일이 지난 지금 얼마나 달성했는지 돌아보는 시간을 오늘 준비한 음식인 떡국을 먹으며 가져보는 것도 좋을 것 같습니다. 왜냐하면, 떡국이 지닌 의미가 바로 갱생부활, 새로운 시작이기 때문입니다. 예전에 설날엔 모든 것이 새로 시작된다는 의미로, 몸과 마음을 깨끗하게 하고자 맑은 물에 흰 떡을 넣어 끓인 떡국을 먹었다고 합니다. 가래떡의 흰색은 근엄함과 청결함을 뜻했기 때문에 좋지 않았던 일들을 깨끗이 씻어버리고, 좋은 일들만 있기를 바라는 뜻도 있답니다. 모두들 2019년 좋은 일만 가득하시길 바랍니다! 자취생, 또한 기숙사에 사시는 학생 분들을 위해 쉽고 간단한 레시피를 준비 하였으니, 다들 꼭 만들어 보았으면 합니다.
사진 출처 : https://goo.gl/images/KdTbPy

떡국 재료 (1인분 기준) : 떡국 떡 400g, 소고기(100g), 대파 1/2개, 다진 마늘, 계란 1개, 국간장, 후추
- 떡을 물에 20~30분 불려줍니다.
- 소고기를 먹기 좋게 썰어 줍니다.
- 달궈진 냄비에 참기름을 두르고 국간장 1/2큰술, 다진 마늘, 후추로 간을 한 뒤 고기를 볶아줍니다.
- 고기를 볶은 후 물 또는 육수를 붓고 다시 끓여줍니다. 끓일 때 나오는 거품도 걷어주면 좋습니다.
- 물에 불려 두었던 떡을 넣고 3~5분 정도 끓여줍니다. 이 때 국물 간을 보고, 다시 간을 맞춰 줍니다.
- 국물이 팔팔 끓으면 계란을 풀어서 넣고, 대파를 넣어, 김을 뿌려 마무리 합니다.
- 맛있게 먹는다!
Happy New Year! For Koreans, auspicious food for a prosperous New Year is definitely tteokguk (떡국) which literally means rice cake soup! For the soup, garetteok (가래떡), the rice cake, is sliced into thin oval shapes. The white oval shape symbolizes a bright and prosperous new year. also, traditionally, according to Korean age reckoning, everyone’s age went up one year on New Year’s Day, and the process wasn’t totally complete until you had a bowl of tteokguk. So, if you want to start a good new year, and be a mature person by getting an age, you should eat tteokguk (떡국) with this easy recipe! The recipe will be posted on the KBS website, so please go and check the recipe on the website.
Ingredients : rice cake 400g, beef 100g, scallions, chopped garlics, an egg, soy sauce, pepper
- Soak rice cakes in cold water for about 20~30 minutes.
- Cut the cooled beef into 1 – 1 1/2-inch.
- brown the ground beef with a little sesame oil, soy sauce, and chopped garlic.
- Bring broth to a boil.
- Season to taste with soup soy sauce and black pepper.
- Add rice cakes and simmer until tender, about 10 minutes.
- Ladle into individual bowls and then add an egg, seaweed strips and scallions.
- Enjoy your meal!
이번 주의 레시피
2018년 11월 넷째 주
이번 주 11월 넷쨋 주 목요일은 추수감사절인데요, 추수감사절에 미국인들은 한국의 추석과 같이 가족들끼리 모여 파티를 열어 칠면조를 비롯한 여러 음식을 만들어 먹고 이야기를 나누곤 합니다. 한인 유학생 분들은 긴 연휴를 맞이하여, 친구들과 맛있는 음식을 나누어 먹어보는 것은 어떨까요? 그래서 추수감사절에 칠면조와 곁들여 먹을 수 있는 그레이비 소스와 매쉬 포테이토 레시피를 준비했습니다!
그레이비 소스는 원래 칠면조를 구울 때 나오는 육즙에 버터와 밀가루를 넣어 걸쭉하게 만들어 내는 소스이지만, 자취생, 그리고 기숙사 사는 학생분들
치킨 스톡을 이용해 쉽고 간편하게 만들 수 있는 레시피를 준비하였습니다. 또한 매쉬 포테이토도 생각보다 만들기 어렵지 않으니 모두들 이 레시피를 잘 활용하여, 풍성한 음식과 함께 긴 연휴를 만끽하시길 바랍니다!
Happy Thanksgiving Day! Thanksgiving Day is the perfect time to remind one another of the many reasons there are to be grateful. Whether you are gathered around the table with your family or with your friend, sharing foods would not only fill your stomach, but also fill your heart with love. So, the recipes of this week are gravy sauce, and mashed potatoes! Whether you lives in a dorm, or you don’t like cooking, just try those recipes and share your foods with your people, because those recipes are so easy!
그레이비 소스 레시피

(그림 출처: https://www.vitamix.com/vr/ko_kr/recipes/stress-free-turkey-gravy-with-pan-drippings)
재료 : 양파 1개, 버터 3큰술, 밀가루 4큰술, 육수 3컵( 물 3컵 + 치킨스톡 2개), 설탕 1큰술, 소금 후추
- 양파를 채를 썰어 버터 3큰술에 노릇노릇해질 때 까지 볶는다.
- 양파가 갈색으로 볶아지면 밀가루를 넣고 볶아주고, 물을 넣어가며 덩어리가 지지않게 젛어준다.
- 치킨스톡, 설탕을 넣고 끓인다.
- 걸죽해질 때까지 끓여 덩어리를 체에 걸른다.
- 소금, 후추로 간을 한다.
- 통닭구이, 매쉬포테이토, 샐러드와 곁들인다.
- 맛있게 먹는다!
매쉬 포테이토 레시피
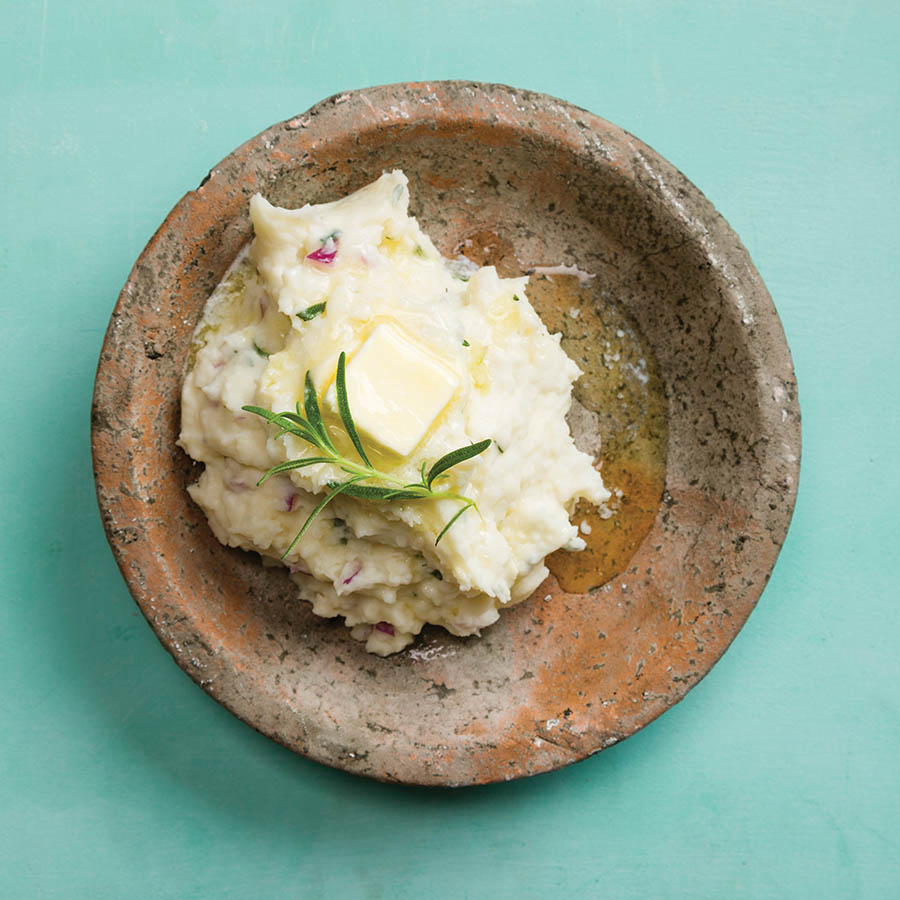
(그림출처: http://doterrakoreablog.kr/2017/02/28/%EB%A1%9C%EC%A6%88%EB%A7%88%EB%A6%AC-%EB%A7%A4%EC%89%AC%EB%93%9C-%ED%8F%AC%ED%85%8C%EC%9D%B4%ED%86%A0/)
재료 : 감자 2개, 소금 1/2스푼, 물 반컵, 우유 4큰술, 크림치즈 2큰술, 버터 2스푼
- 감자 껍질을 벗기고 큼직하게 자른다.
- 물과 소금, 감자를 냄비에 넣고 감자가 푹 익을 때까지 찌고 (약 15분) 물을 빼낸다.
- 감자가 식기전에 버터, 크림치즈, 우유를 넣고 핸드믹서로 돌려준다.
- 소금, 후추로 간을 한다.
- 맛있게 먹는다!
Gravy Sauce Recipe
Ingredients :1 onion, 3 tablespoons of butter, unbleached all-purpose flour, 2 chicken broth, 1 tablespoon of sugar, salt & pepper
- Melt butter in a saucepan on medium high heat.
- Chop the onions and stir fry with butter.
- Add the flour until it becomes a paste and slightly turns brown.
- Slowly incorporate the chicken broth with a whisk.
- Whisk constantly until it thickens.
- Once thickened, season with salt and pepper.
- Enjoy your meal with turkey, mashed potato, or salad!
Mashed potatoes Recipe
Ingredients : 2 potatoes, 1/2 tablespoon of salt, 1/2 cup of water, milk, 2 tablespoons of cream cheese, 2 tablespoons of butter
- Bring a pot of salted water to a boil.
- Add potatoes and cook until tender but still firm, about 15 minutes; drain.
- Using a potato masher or electric beater, slowly blend milk, cream cheese, and butter into potatoes until smooth and creamy.
- Season with salt and pepper to taste.
- Enjoy your meal!
이번 주의 레시피
2018년 11월 둘째 주
이번 주 갑자기 날씨가 급격히 추워져서 11월 11일에는 영하 3도까지 이르렀는데요, 10일 토요일에는 KBS에서 개최한 Buckeye soccer tournament를 통해 경기에 참가한 축구 선수들과 KBS 멤버들이 몸소 추위를 경험 할 수 있었습니다. 점점 더 추워진다고 하니 모두들 감기 조심하시고, 그런 의미로 오늘은 따뜻하게 몸을 녹일 수 있는 오뎅탕 레시피를 준비했습니다.
재료 (2인 기준): 어묵 4장, 양파 1개, 파 1개, 고추, 1개, 마늘 2개, 간장, 소금, 후추
(육수를 내기위해 다시마 혹은 멸치가 있으면 좋습니다)
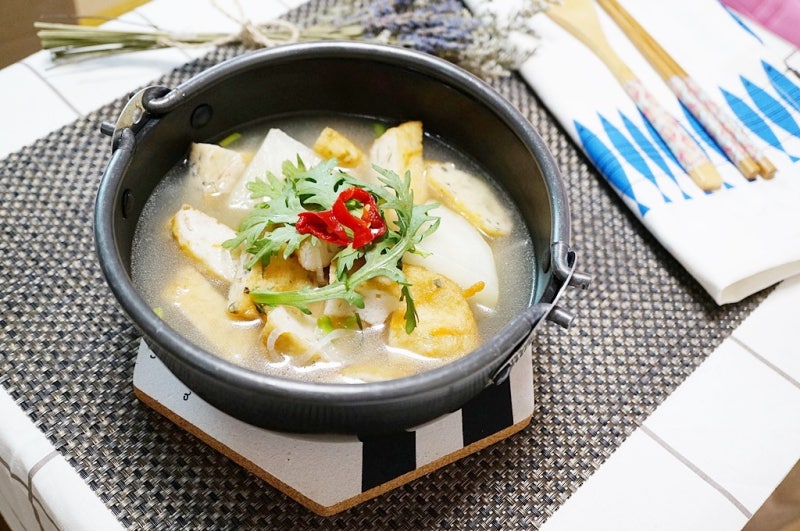
(그림출처: https://m.blog.naver.com/PostView.nhn?blogId=lovesj3412&logNo=221038517187&proxyReferer=https%3A%2F%2Fwww.google.com%2F)
큰 냄비에 물 2컵을 부어주고, 멸치와 다시마로 육수를 내줍니다. (없다면 생략 가능)
- 양파와 파, 고추를 손질해주고, 마늘을 빻아 다진 마늘을 준비합니다.
- 물이 끓을 때 어묵, 다진마늘, 대파, 고추 순으로 냄비에 넣어줍니다.
- 간장으로 간을 맞추고, 필요하다면 소금과 후추를 넣어 간을 알맞게 합니다.
- 기호에 따라 고춧가루를 넣으면 칼칼한 오뎅탕이 됩니다.
자취생이나 기숙사 생활을 하시는 분들을 위해 쉽고 간단하게 준비해 보았으니 모두들 레시피를 보고 오뎅탕 같이 만들어 보았으면 합니다.
이번 주의 레시피
2018년 10월 다섯째 주
요즘 음식 잘 챙겨 드시고 계신가요? 혹시 라면으로 매일 저녁을 때우시진 않는지요? 라면은 유학생이나 자취생의 필수템으로서 매우 간편하게 한끼 식사를 해결할 수 있지만, 너무 많이 먹다보면 질리기도 해서 다른 음식들이 그리워지곤 하는데요, 그래서 이번 주 레시피는 라면으로 만드는 크림 스파게티 입니다! 집에 쌓여있는 라면은 많지만, 오늘도 라면으로 해결하고싶지 않을 때 이 레시피를 참고하여 크림 스파게티를 만들어 먹으면 좋겠죠?

(그림출처: http://snac.chosun.com/5061)
재료 (1인 기준) : 마늘, 소금, 후추, 양파 (1/2개), 치즈 1장, 우유 200mL, 라면, 베이컨
- 면을 스프를 넣지 않고 끓여줍니다.
- 끓이는 동안, 양파 반개를 먹기 좋게 잘라주고, 마늘도 얇게 썰어줍니다.
- 면이 80퍼센트 정도 익으면 꺼내서 빈 그릇에 옮겨줍니다.
- 팬에 기름을 두르고 마늘과 베이컨을 넣고 살짝 볶아줍니다.
- 후추와 소금을 넣어 간을 맞춰줍니다. (각 세꼬집씩 넣어주면 간이 적당합니다.)
- 양파와 라면을 넣고 볶아줍니다.
- 우유 200mL와 치즈 한장을 넣어 잘 녹을 때까지 섞어줍니다.
- 맛있게 먹는다!
가끔 라면이 질릴 때, 혹은 파스타가 먹고싶을 때 쉽고 간편하게 라면을 이용하여 크림 파스타를 만들어 먹으면, 색다른 맛을 느낄 수 있겠죠? 또한, 우유대신 생크림이나, 베이컨에 맛살을 추가하면 더욱 깊은 맛이 난다고 합니다!
이번 주의 레시피
2018년 10월 넷째 주
추억의 과자 달고나! 초등학교 때 하굣길 500원 씩 내며 먹었던 추억이 하나씩 있으시죠? 모양대로 먹으면 그렇게 기분이 좋았는데요, 이번 주는 쉽게 만들 수 있는 달고나를 준비했습니다!

(그림 출처: https://m.blog.naver.com/PostView.nhn?blogId=rupil&logNo=70173442034&proxyReferer=https%3A%2F%2Fwww.google.com%2F)
재료: 설탕, 소다, 국자, 젓가락
- 밑판에 설탕을 어느정도 깔아준다(이것이 달고나가 달라붙는것을 방지해준다)
- 국자에 적당량의 설탕을 담은다 (티스푼 4스푼)
- 국자에 담아놓은 설탕을 약불로 가열하면서 저어준다
- 설탕이 액체 상태로 녹으면 소량의 소다를 넣는다.
- 설탕이 완전 액체 상태가 되어서 소다를 넣을 경우 국자를 들어 불에서 잠깐 떨어트려 준다
- 녹은 설탕에 소다를 넣고 바로 불에 올리지 말고 그상태로 소다와 설탕을 몇번 저어주다가 불에 다시올린다.
- 약간 부풀어 오른 달고나를 설탕이 뿌려진 밑판에 두어 설탕을 뿌린 뒤 10초~20초 지난 뒤에 누른다.
- 맛있게 먹는다!
이번 주의 레시피
2018년 10월 셋째 주
미드텀이 한창인 지금, 미드텀이 끝났어도 이것 저것 할 것 많은 바쁜 대학생들을 위해 재료 구하기도 쉽고 한 번 해 놓으면 반찬 필요없이 뚝딱 먹을 수 있는 감자 짜글이를 준비 했습니다!
짜글이란? 돼지고기에 각 종 채소를 넣고 자작하게 끓인 충청도 향토 음식

(그림 출처: 네이버 블로그 https://m.blog.naver.com/PostView.nhn?blogId=dungi355&logNo=221044406441&proxyReferer=https3A%2F%2Fwww.google.co.kr%2F)
재료 : 감자 2개, 양파 1개, 대파 1개, 스팸 150g, 고추장, 된장, 고춧가루, 설탕, 간장, 마늘 ( 2~3인 기준) / 취향대로 청양고추, 떡 추가 가능
- 감자, 양파, 대파, 스팸을 먹기 좋게 자른다.
- 스팸을 위생팩에 넣고 손으로 으깨준다.
- 채 썬 감자와 양파, 스팸을 냄비에 넣는다.
- 된장 1/3 스푼, 고추장 1스푼, 고춧가루 2스푼, 설탕 1스푼, 진간장 3스푼, 다진 마늘 1스푼, 물 360mL 를 냄비에 넣고 각종 재료들과 잘 섞어준다.
- 썰어 놓은 파와 추가하고 싶은 나머지 재료를 넣는다.
- 국물에 약간 점성이 생길 정도로 끓인다.
- 맛있게 먹는다!
한인 유학생들이 미국에 있다보면 매운 음식, 국물 음식, 그리고 밥이 정말 먹고 싶을 때가 많은데요, 짜글이를 만들어 먹으면 이 모든 것을 해결해 줄 뿐만 아니라, 바쁠 때 간편하게 먹을 수 있기에 최고의 음식이 아닐까 싶습니다!!
OSU 한인 학생분들! 가을 방학이 일주일 남짓 남았는데, 남은 시험과 프로젝트로 바쁘고 스트레스 받을 때 짜글이 만들어 먹는거 추천합니다!
이번 주의 레시피
2018년 10월 둘째 주

한 설문조사에 따르면, 외국인들이 좋아하는 음식 top 3에 불고기가 올랐다고 합니다! 외국인 친구들과 직접 만든 불고기를 나누어 먹으면 좋은 추억을 쌓을 수 있을 것 같네요.
재료 ( 2인 기준) : 돼지고기 600g, 양파 1개, 파 2대, 당근 1/2개, 당면 간장, 설탕, 식초, 참기름, 다진마늘 / 뚝배기( 없으면 유리냄비 가능)
- 당근, 양파, 파를 채를 썰어 준다.
- 간장 6큰술, 설탕 2큰술, 식초 1큰술, 참기름 2큰술, 다진마늘 1큰술을 넣어 양념 소스를 만든다.
- 돼지고기와 양념을 비벼서 30분간 재워준다.
- 당면도 같이 30분간 물에 불려 놓는다.
- 뚝배기나 유리냄비에 당면, 양념된 고기, 야채 순으로 올린다
- 뚝배기의 2/3정도 물을 채우고 중불에서 익힌다.
- 간이 싱거우면 국간장이나 소금을 넣어 간을 맞추고 보글보글 익으면 당면이 눌러 붙지 않게 잘 섞어준다.
- 맛있게 먹는다!
날씨가 급격히 추워진 지금, 뚝배기 불고기 속의 자작한 국물은 우리의 몸과 힘든 마음까지 녹일 수 있지 않을 까요? 그래서 이번주 레시피는 뚝배기 불고기를 준비 했습니다!
이번 주의 레시피
2018년 10월 첫째 주

(그림 출처: http://www.10000recipe.com/recipe/6865674)
스팸 돈부리 덮밥
돈까스 대신 스팸을 사용하고, 소스도 쉽게 만들 수 있어 매우 간편하지만 든든하기까지 하여 간단한 한끼 식사로 만들기 좋은 스팸 돈부리 덮밥. 돈부리 덮밥은 가츠동이라고도 불리는 돈까스에 달걀과 간장소스가 얹어진 일본식 덥밥인데, 돈까스 대신 스팸을 사용하여 한국인의 입맛에 더욱 맞게 드실 수 있습니다!
재료 (2인 기준) : 스팸 반개, 달걀 2개 양파 1개, 간장, 설탕, 대파, 후추, 식용유
- 양파, 대파, 스팸을 먹기 좋은 크기로 썬다.
- 식용유를 두르고 스팸을 굽는다.
- 후라이팬에 양파를 살짝 볶고, 설탕 1.5스푼, 간장 3스푼, 물 9스푼을 넣고 약한 불에서 끓인다.
- 구운 스팸을 넣는다.
- 달걀을 풀어 넣고, 달걀이 설익을 때쯤 불을 끈다.
- 공기에 밥을 담고 끓인 소스를 얹어준다.
- 맛있게 먹는다.